BrewMarkBREWMARK
February 13, 2026
equipment/grinders/maintenance

How to Clean Your Coffee Grinder (and Why It Matters)

A complete guide to cleaning burr grinders for better-tasting coffee. Learn how often to clean, what tools you need, and how grinder retention affects flavor.

|BrewMark Team

A dirty grinder is the silent killer of good coffee. Old grounds and rancid oils build up in the burr chamber, and every time you grind fresh beans, you're mixing them with stale coffee dust from last week. This guide shows you how to clean your grinder properly and how often to do it.

Why cleaning your grinder matters

Rancid coffee oils ruin flavor

Coffee beans contain oils (lipids) that carry flavor compounds. When you grind coffee, these oils coat the burrs and inner chamber. Over time (days to weeks depending on usage), those oils oxidize and go rancid.

Rancid coffee oil tastes stale, flat, and sometimes soapy or waxy. Even a small amount mixed with fresh grounds will muddy the flavor of your brew. You'll notice:

  • Loss of brightness and clarity
  • Muted aromatics (the coffee smells less vibrant)
  • A stale, cardboard-like aftertaste
  • Inconsistent flavor from day to day (because the amount of rancid residue varies)

Dark roasts accelerate this. Darker roasts have more surface oils, which means faster buildup and faster rancidity. If you grind dark roast daily, clean every 2 weeks. For light roasts, every 3-4 weeks is fine.

Grinder retention affects consistency

Retention is the amount of coffee that stays trapped in the grinder after each use. All grinders retain some amount — it's unavoidable. Grounds get stuck in the burr chamber, the chute, and the exit spout.

Why it matters:

  • Retained grounds go stale quickly (within hours of grinding, aromatics start to fade)
  • On your next grind, those stale grounds mix with fresh coffee
  • The longer you wait between grinds, the staler the retained coffee becomes

Typical retention by grinder type:

  • Flat burr grinders: 0.5-2.0g retention (more surface area = more places for coffee to stick)
  • Conical burr grinders: 0.2-0.8g retention (gravity helps grounds fall through)
  • Blade grinders: 0.1-0.5g retention (less internal structure, but terrible grind quality for other reasons)

A grinder that retains 1.5g means if you grind 15g of fresh coffee, you're getting ~13.5g fresh + ~1.5g stale. That 10% stale coffee is enough to dull the cup noticeably.

The fix: Regular cleaning and purging (grinding a small amount of coffee to flush out old grounds before your real dose). More on purging below.

How often to clean your grinder

UsageCleaning frequency
Daily (dark roast)Every 2 weeks
Daily (light roast)Every 3-4 weeks
2-3 times per weekEvery 4-6 weeks
Weekly or lessEvery 2-3 months

Signs your grinder needs cleaning (clean sooner if you notice these):

  • Coffee tastes flat or stale even with fresh beans
  • Visible oil buildup on the burrs or hopper
  • Grind consistency degrades (more fines than usual)
  • The grinder feels harder to turn (hand grinders) or sounds louder (electric grinders)
  • You switched from dark roast to light roast (clean before switching to avoid flavor contamination)

If you can't remember the last time you cleaned your grinder, clean it today.

What you need to clean a burr grinder

Essential tools

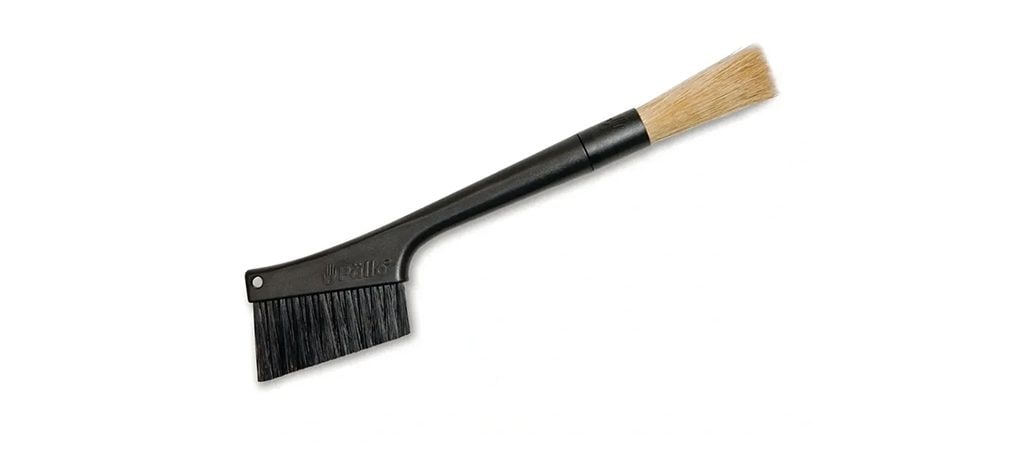
  • Stiff brush — a small paintbrush, grinder cleaning brush, or old toothbrush works. Avoid brushes with soft bristles (they won't dislodge stuck grounds).
  • Dry microfiber cloth or paper towel
  • Compressed air (optional but helpful) — a can of compressed air or a small air blower (like photographers use for camera sensors)

Optional tools

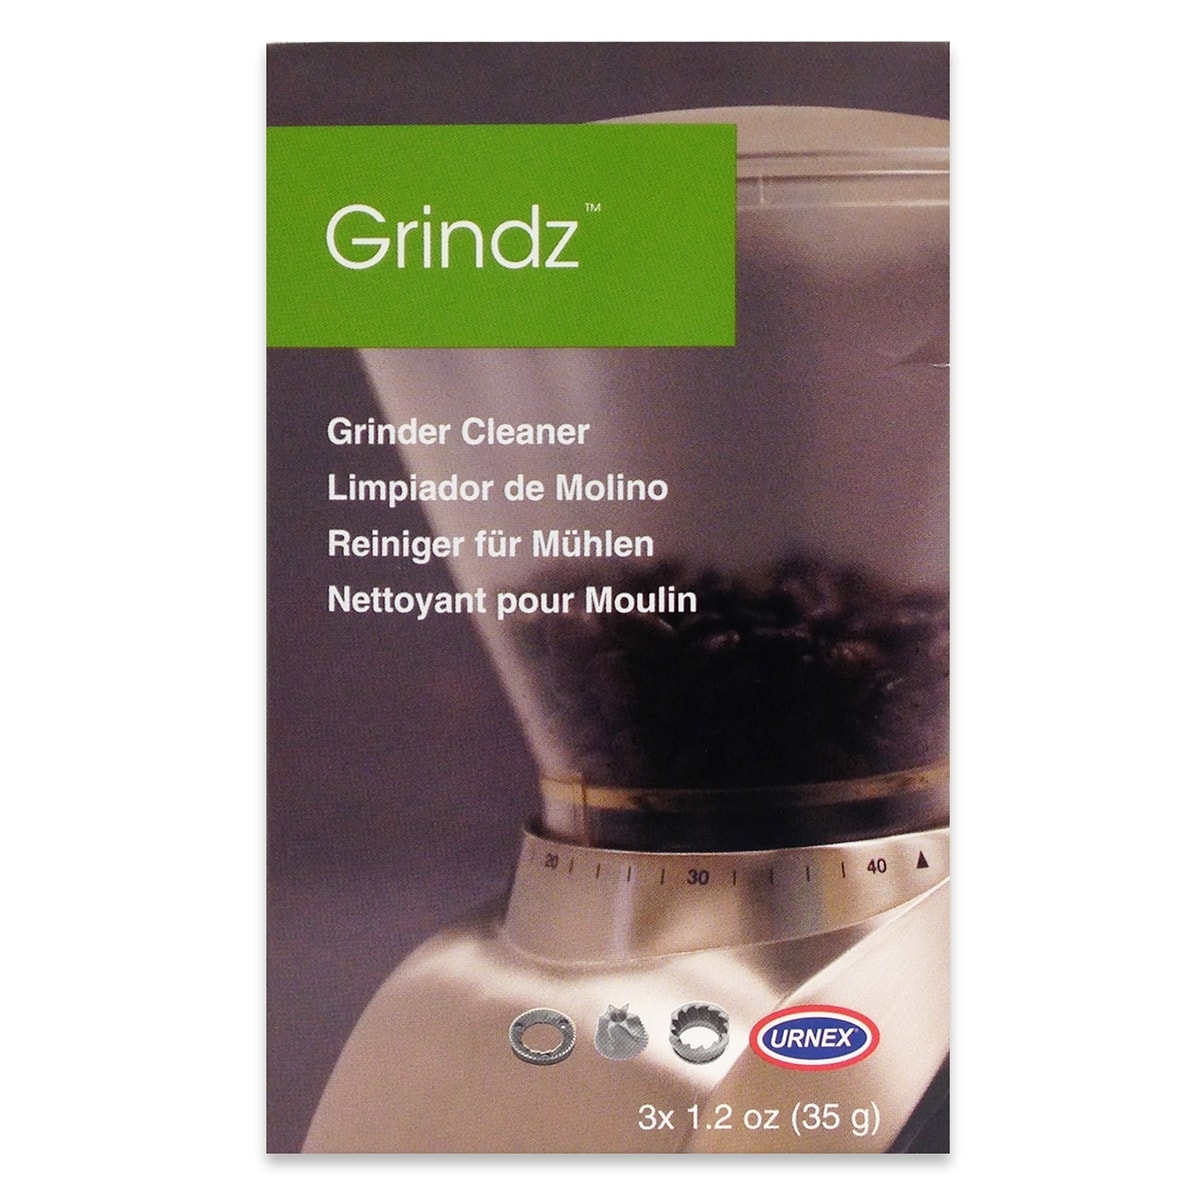
  • Grinder cleaning tablets (Urnex Grindz, Full Circle) — these are compressed pellets made from food-safe materials that scrub the burrs as they pass through. Effective but not mandatory.
  • Small vacuum or handheld vacuum — useful for sucking out loose grounds from hard-to-reach areas
  • Wooden or plastic skewer — for dislodging stuck grounds in tight corners (never use metal, it can scratch burrs)

What NOT to use:

  • Water (unless your grinder manual explicitly says burrs are dishwasher-safe, which is rare). Water causes steel burrs to rust. Ceramic burrs can handle water, but you must dry them completely before reassembling.
  • Metal tools (screwdrivers, tweezers) — they can scratch or chip burrs, which ruins grind consistency.
  • Soap or detergent — residue can contaminate coffee flavor. Dry cleaning only.

Step-by-step grinder cleaning process

Step 1: Empty the hopper and grind chamber

Remove any whole beans from the hopper. If your grinder has a removable hopper, take it off and set it aside.

Run the grinder (empty) for 3-5 seconds to clear out any loose grounds in the chamber and chute. This is called a purge.

Step 2: Disassemble the grinder

For hand grinders:

  1. Remove the handle
  2. Unscrew the adjustment ring or dial
  3. Lift out the top burr (it usually just pulls out)
  4. The bottom burr is fixed — leave it in place

For electric grinders:

  1. Unplug the grinder (safety first)
  2. Remove the hopper (usually twists off)
  3. Remove the top burr assembly (check your manual — some twist off, others require unscrewing)
  4. The bottom burr is usually fixed, but some models let you remove it too

Check your manual if you're unsure. Most grinders are designed for easy disassembly, but some (like the Baratza Vario) have more complex burr carriers that require screwdrivers.

Take a photo of the burr assembly before disassembling if you're worried about forgetting how it goes back together.

Step 3: Brush out the burrs and chamber

Use a stiff brush to remove all visible grounds and oil buildup:

  1. Brush the burrs — scrub the cutting edges and flutes (the ridges on the burr surface). Coffee oils and fines accumulate here. Brush in the direction of the flutes, not against them.
  2. Brush the burr chamber — the inner walls of the grinder body. Use a wooden skewer or compressed air to dislodge stuck grounds in corners and threads.
  3. Brush the chute and exit spout — grounds love to hide here. Tilt the grinder and tap it gently while brushing to knock loose grounds free.

For stubborn oil buildup: Wipe the burrs with a dry cloth. If the oil is sticky and thick (common on dark roast grinders), you can use a very slightly damp cloth, but dry the burrs immediately with a paper towel and let them air-dry for 10-15 minutes before reassembling. Moisture on steel burrs = rust.

Step 4: Use grinder cleaning tablets (optional)

If you have Urnex Grindz or similar cleaning tablets:

  1. Reassemble the grinder
  2. Pour ~35-40g of cleaning tablets into the hopper (follow the product instructions for exact dose)
  3. Grind the tablets on a medium setting (the same setting you'd use for pour over)
  4. The tablets will scrub the burrs and absorb residual oils as they pass through
  5. Discard the ground tablet dust (it's food-safe but don't brew it)
  6. Run 10-15g of cheap coffee through the grinder to flush out any remaining tablet residue
  7. Discard that coffee too

Pros: Deep cleaning without disassembly, removes oils you can't reach with a brush.

Cons: Adds cost (~$0.50-1.00 per cleaning), doesn't replace physical disassembly (you still need to brush out the chamber every few months).

Verdict: Use tablets every 2-4 weeks for maintenance cleaning, and do a full disassembly + brush cleaning every 2-3 months for deep cleaning.

Step 5: Reassemble the grinder

Put everything back together in reverse order:

  1. Replace the bottom burr (if you removed it)
  2. Drop the top burr back into place (check alignment — the burr should sit flat and centered)
  3. Reinstall the adjustment ring or dial
  4. Reattach the handle (hand grinders) or hopper (electric grinders)

For electric grinders: Some models require you to recalibrate the burrs after reassembly. Check your manual. The Baratza Encore, for example, has a simple calibration process where you twist the adjustment ring to align the burrs before locking it down.

Step 6: Purge with fresh coffee

Grind 5-10g of cheap coffee (use old beans or a sacrificial dose of your current bag) and discard it. This flushes out any remaining dust or brush fibers left from cleaning.

After this purge, your grinder is ready for clean, fresh coffee.

Daily maintenance: the grind-and-purge habit

You don't need to fully disassemble your grinder every time you brew, but a quick purge before your daily dose makes a noticeable difference.

What is purging?

Purging = grinding a small amount of coffee (3-5g) and discarding it before grinding your real dose. This flushes out stale retained grounds from the previous session.

How to purge:

  1. Grind 3-5g of fresh coffee (from the same bag you're about to brew)
  2. Discard that coffee
  3. Grind your real dose (15-20g for pour over)

When to purge:

  • First grind of the day (the grinder has been sitting overnight with stale grounds inside)
  • After switching beans (to avoid flavor contamination from the previous coffee)
  • If you notice inconsistent flavor day-to-day

Is purging wasteful? Yes, you're throwing away 3-5g of coffee per day (~100-150g per month if you brew daily). But the flavor improvement is worth it. Think of it as the cost of consistency.

Alternative to purging: Some grinders (like the Niche Zero or DF64) are designed for zero retention or near-zero retention. If you're buying a new electric grinder and hate waste, prioritize low-retention models.

Switching between coffee types (light roast ↔ dark roast)

If you switch from dark roast to light roast (or vice versa), clean the grinder before switching. Dark roast oils will contaminate the bright, delicate flavors of a light roast. Light roast residue is less of an issue going the other direction, but it's still best practice to clean between bean swaps.

Quick switch method (if you can't do a full clean):

  1. Grind 10-15g of the new coffee and discard it (double purge)
  2. This flushes out most of the old coffee's oils and grounds
  3. Your first real cup won't be perfect, but it'll be close

Full clean method (preferred):

  1. Disassemble and brush out the burrs and chamber
  2. Wipe down oily residue with a dry cloth
  3. Reassemble, purge 5g, and grind your new coffee

Troubleshooting common grinder issues

Issue: Coffee tastes flat or stale even with fresh beans

Likely cause: Rancid oils or old retained grounds in the grinder.

Solution: Full disassembly cleaning. Brush out all visible buildup, wipe burrs with a dry cloth, and purge with 10g of fresh coffee after reassembling.

Issue: Grind consistency degrades (more fines, uneven particle size)

Likely cause: Burr misalignment or burr wear.

Solution:

  1. Check burr alignment after reassembly — the top burr should sit flat and centered. If it's tilted or wobbly, remove and reseat it.
  2. Inspect burrs for wear. Burrs last 500-1000 lbs of coffee (years for home users, months for cafes). If the cutting edges look dull or rounded, it's time to replace them.

Issue: Grinder is harder to turn (hand grinders) or louder (electric grinders)

Likely cause: Coffee buildup creating friction, or burrs need lubrication (rare for home grinders).

Solution:

  1. Disassemble and clean thoroughly
  2. Check for stuck grounds in the adjustment mechanism
  3. For hand grinders, some models (like the Comandante) benefit from a tiny drop of food-safe mineral oil on the axle threads every 6-12 months (check your manual first)

Issue: Grinder retains too much coffee (more than 1-2g)

Likely cause: Design flaw (some grinders just retain more) or coffee buildup narrowing the chute.

Solution:

  1. Clean the chute and exit spout thoroughly
  2. If retention is still high, consider upgrading to a low-retention grinder (Niche Zero, DF64, Fellow Ode Gen 2) or accept purging as part of your workflow

Does grind size affect how often you should clean?

Yes. Finer grinds create more fines (tiny coffee dust), which cling to burrs and accumulate faster. If you grind espresso daily, clean every 1-2 weeks. If you only grind coarse for French press, you can stretch to 4-6 weeks.

Pour over grind (medium) sits in the middle — 3-4 weeks is the sweet spot for daily users.

Use the Grind Converter to see where your grind setting falls on the fineness scale (grind index 0-100).

When to replace burrs (not just clean them)

Burrs wear out over time. Dull burrs produce inconsistent grinds and more fines, which ruins extraction quality.

Burr lifespan:

  • Home use (1-2 cups per day): 5-10 years
  • Heavy home use (4-6 cups per day): 2-5 years
  • Cafe use: 6-12 months

Signs your burrs need replacing:

  • Grind consistency noticeably degrades even after cleaning
  • Burrs look visibly worn (smooth, rounded edges instead of sharp cutting surfaces)
  • Coffee tastes flat or muddy no matter how you adjust grind, dose, or technique

Replacement cost:

  • Hand grinders: $30-80 for new burr sets (Comandante, 1Zpresso, Timemore all sell replacement burrs)
  • Electric grinders: $40-150 depending on model (Baratza Encore burrs: $35, Niche Zero burrs: $120)

Replacing burrs is cheaper than buying a new grinder, and it restores grind quality to like-new performance.

Final tips for grinder maintenance

Keep beans out of the hopper between uses

Don't store beans in the grinder hopper overnight. Oils from the beans transfer to the hopper walls and go rancid. Hopper cleaning is annoying (narrow walls, hard to reach).

Instead: Dose beans directly before grinding. Keep beans in their original bag or an airtight container.

Use the right grind setting for your brew method

Grinding too fine for your method creates excess fines, which cling to burrs and accelerate buildup. Use the Brew Calculator to find the right dose and ratio, and the Grind Converter to translate grind settings to your specific grinder.

Track cleaning schedule

Set a recurring calendar reminder (every 3-4 weeks) to clean your grinder. It's easy to forget until the coffee starts tasting off.

Alternatively, use a brew journal app (like BrewMark) to log when you last cleaned your grinder alongside your brew notes.

Conclusion

Cleaning your grinder takes 10-15 minutes and transforms the quality of your coffee. Fresh beans with a dirty grinder = wasted potential. Clean burrs with stale beans = you'll still taste the staleness, but at least the grind will be consistent.

The minimum viable habit:

  1. Full disassembly cleaning every 3-4 weeks (for daily users)
  2. Daily purge (3-5g sacrificial dose) before your real grind
  3. Switch beans = clean before switching

Your coffee will taste brighter, clearer, and more consistent. And you'll stop wondering why that $20/lb bag isn't living up to the tasting notes.

Newsletter

Get brewing tips in your inbox

Join the BrewMark community. We share grind guides, recipe breakdowns, and gear reviews — no spam, ever.

No spam. Unsubscribe anytime.

← All postsPublished February 13, 2026